1. Read your sewing pattern before cutting.
Let me paint a picture: I’m on step 3, and the pattern tells me to fold one collar edge under by ½ cm and press it. Getting up from my machine, turning on the iron, and pressing that tiny fold feels like a burden—especially when I don’t yet know what it’s for. I tell myself, “This will probably help later, but it can’t matter that much.”
Then I reach step 5 and understand: that fold would have made attaching the collar much easier. I can still go back, but it is much harder to do neatly.
That’s why I now read the instructions all the way through before I begin. I don’t need to memorize them; I just want to understand the order and spot the details that will matter later.
Pay attention to notches—the small matching marks along pattern edges—and other pattern markings. They help the pieces line up correctly at yokes, sleeves, collars, and other seams, so transfer them before you start sewing.
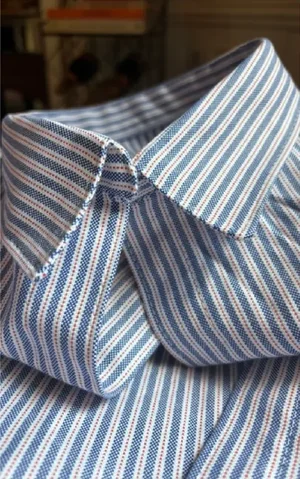
The habit: Skim the whole pattern once before cutting, then reread each step as you sew.
2. Choose fabric that suits your sewing pattern.
I have easily made this mistake more than once. When I first started sewing, I thought all cotton fabric was basically the same. I went to the store for fabric for a simple white T-shirt and came home with white quilting cotton instead of cotton jersey.
Even in the store, I remember thinking, “This doesn’t feel quite right, but I think it will do.” I finished the shirt, but the fabric had no stretch, so it sat stiffly and felt awkward. That’s when I learned that “cotton” tells you the fiber—not how the fabric will behave.
Quilting cotton has a crisp, stable body. Cotton jersey is knitted, so it stretches and moves more like a T-shirt. Neither is bad; they simply suit different projects.
Before you shop, check the pattern’s recommended fabric types and whether it needs stretch. Think about weight, drape—how the fabric hangs and falls—and structure, too.
The habit: Let the pattern and the finished look guide your fabric choice; don’t just choose at random.
3. Test the fit with a sewing mock-up.
I didn’t start making mock-ups until at least a year into sewing. The idea of sewing a whole test garment seemed ludicrous—especially when a pair of pants was already taking me 20–30 hours. Then one pair didn’t fit the way I wanted, and I kicked myself for not doing a test run.
A mock-up is a quick test version, often made with muslin (a plain woven cotton), that you make before cutting into your final fabric. It is especially useful for fitted garments or whenever ready-made clothes and patterns rarely fit you well.
Choose an inexpensive test fabric with similar weight, drape, and stretch to your final fabric. A stiff woven mock-up will not tell you much about the fit of a stretchy jersey T-shirt.
You do not need to finish every detail. Sew only what you need to assess the fit. Baste any necessary closures, using long, temporary stitches, and skip pockets, hems, and seam finishes unless they affect the fit or you want the practice.
Try it on, pin or mark the changes, and transfer those adjustments to the paper pattern before you cut the real fabric.
You can see how I use test versions to work through fit in my button-down project.
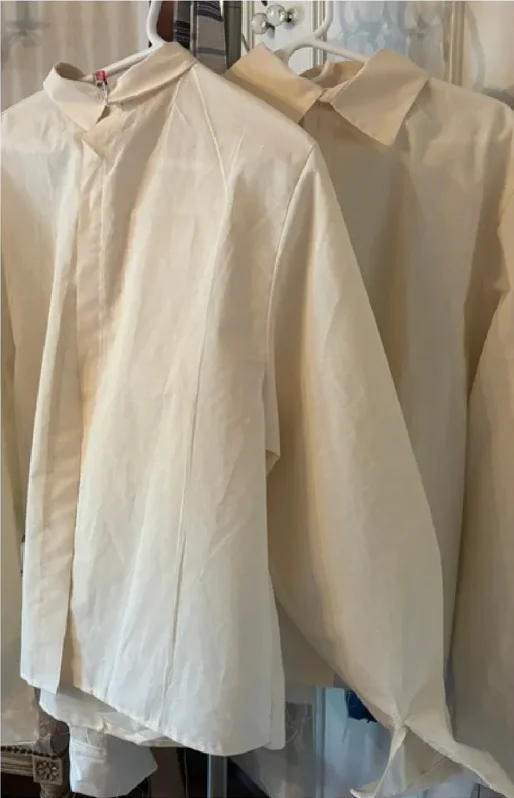
The habit: Make a quick test whenever fit, expensive fabric, or an unfamiliar pattern raises the stakes.
4. Prewash and press your fabric before cutting.
This may sound almost too simple, but beginners skip it all the time—and it can cause real heartache later. I learned that from my earliest garments.
When you have the fabric, the pattern, and a project you cannot wait to start, prewashing can feel like the biggest inconvenience. You may have to wait a day for the fabric to air-dry before you can even cut it.
But if you love the finished garment and then remember you skipped this step, the first wash can feel risky. The fabric may shrink, bleed, or pucker along the seams.
Prewash and dry the fabric the same way you plan to care for the finished garment, always following its care instructions. For fabric that should not be washed, follow its recommended preshrinking method. Then press it flat before laying out the pattern.
The habit: Treat fabric preparation as the first step of the project, not a delay before the project begins.
5. Cut carefully and check the grainline.
When I was sewing in my small room in Madrid, I didn’t have a huge studio table—or even enough floor space—to lay out my fabric properly. I placed the pattern pieces more or less parallel to the selvage and cut however I could. If a piece was a little off, I didn’t worry about it.
Then, in my first formal sewing class, my teacher had me unpin every pattern piece because the grainlines were a few centimeters off. That was when I understood that “cut on grain” is not busywork.
The selvage is the finished edge along each side of woven fabric. The grainline arrow on a pattern shows how to orient the piece on the fabric.
On most pattern pieces, the grainline arrow should run parallel to the selvage unless the pattern tells you otherwise. Measure from the arrow to the selvage at two points and adjust the piece until both measurements match.
If a piece is cut off-grain, it may twist, hang unevenly, or refuse to sit the way you expected.
I have spent ten minutes getting fabric on grain, pinned everything, and then realized I needed to start over. It happens. There is no rush. You are here to make clothes, use your hands, and enjoy the process. Slowing down is part of the beauty of it.
The habit: Check the grainline twice before you cut once.
6. Press as you sew.
One thing that surprises people about sewing is how much time you spend at the iron. When I started, I thought I was set with my machine and little starter kit. How wrong I was.
One summer, I took over the dining room at my childhood home and set up an impromptu studio. I was sewing a lot, and my little sister was always amazed that every time she walked by, I was pressing instead of sewing.
Pressing helps seams lie flat and gives a garment that clean, well-made finish. A tutorial may say “press the seam open” or “press toward the back” and then move on. It is easy to treat that as optional. It is not.
To press, lower the iron onto the fabric, then lift it to move to the next spot. Sliding the iron back and forth can stretch the fabric out of shape.
Press each construction seam before it crosses another seam or becomes enclosed in the next step. Use the heat and steam appropriate for the fabric, and test a scrap if you are unsure. A press cloth—a layer between the iron and the fabric—is useful for delicate fabrics and fusible interfacing.
Keep the iron and ironing board close enough that pressing does not feel like a separate chore.
The habit: Stitch, press, continue.
7. Finish the inside neatly—with or without a serger.
When I started sewing, I did not clean up the inside of my garments. With those first projects, I was so happy to get all the pieces together that the inside felt like the least of my worries.
But a neat interior is not only about appearance. The right seam finish can control fraying and help a garment hold up to washing and wear. A seam finish tidies or encloses the raw cut edges left beside the stitching.
If you do not have a serger (also called an overlocker), you still have plenty of options. Depending on the fabric and pattern, you can use:
- A zigzag or overcast stitch to finish raw edges with a regular sewing machine.
- Pinking shears, which cut a zigzag edge. Pinking reduces fraying but may not be enough on its own, especially for garments that will be washed.
- A French seam, which encloses the raw edges inside the seam. It works especially well for light- to midweight wovens.
- A flat-felled seam, which encloses the raw edges and is stitched down flat. This sturdy finish is common in shirts, denim, and workwear.
Decide before sewing because enclosed seams can change the construction order or seam-allowance requirements. The seam allowance is the fabric between your stitching line and the cut edge.
For another example of finishing choices, my adjustable linen blouse uses narrow baby hems at the armholes and binding around the neckline and lower edge.
The habit: Choose a seam finish that suits the fabric, seam, and way the garment will be worn.
More on pinking and other finishes: Sewing & Craft Alliance’s seam-finishing guide (PDF).
Take your time. Make mistakes. Wear what you’re proud of.
Choose one habit to try on your next project—then notice what changes. Small steps add up.
Sewing gave me the creative hobby I was looking for, and it has become something much bigger. If you are starting from zero, keep going.
 Instagram
 TikTok